仕事と嘘をつく旦那
「旦那が仕事と嘘をついているっぽい」
「もしかして浮気しているかもしれない」
といった悩みはありませんか?
例えば
このような行動の変化が見られるときは浮気を疑ってしまいますよね。
実は、私の旦那も急に残業や休日出勤が増え、行動も怪しくなってきたので
「もしかして浮気しているかもしれない」
と思っていました。ですから、浮気を疑ってしまう気持ちはよく分かります。
浮気しているかもしれないと疑うと、どうにかして事実を確かめたくなりますよね。
そこで、この記事では旦那の浮気を見破る方法について
私が調べたことや専門家に相談して聞いたことなどをまとめています。
また浮気していると見破った後に「浮気をやめさせたり離婚するときに有利になる方法」についても紹介します。
実際に、私もこの方法で浮気相手と別れさせることができました。
具体的には、
について詳しくまとめています。
浮気に気付いたときは目の前が真っ暗になって食事も喉を通りませんでした。
でも気付いてすぐ行動に移したので、傷が浅いうちに浮気を止めさせることができました。
少し痩せてしまいましたが、どん底だった気持ちもなんとか平穏を取り戻し落ち着いています。
浮気かもしれないと思ったときは早めに対処することで最悪の状況を回避できる可能性が高くなります。
浮気に悩んでいる方や、浮気かもしれないと感じている方に役立つ内容なので最後まで読んでみてください。
旦那が仕事を嘘をつくときにはどんな理由があるのでしょうか?
主に次のような理由があります。
この中でも一番許せないのは浮気していることですよね。
実は浮気を隠すために仕事と嘘をついているケースが多いです。
浮気している旦那が仕事と嘘をつくときによくあるパターンを紹介します。
これらのパターンは浮気ではなく実際に仕事のことも多いので、すぐに浮気と決めつけるのは早いです。
上記のような理由で仕事に行ったり帰りが遅いことが何度もあるときは、浮気かもしれないので注意しましょう。
浮気している男性によく見られる兆候があるのでチェックしてみてください。
次のような行動の変化が見られるときは浮気を疑った方が良いでしょう。
仕事と嘘をついているだけでなく浮気の兆候が見られるなら、浮気をしている可能性が高いです。
浮気を放置すると
状況が悪化していく
浮気は早めに対策することが重要です。
悩むだけで何もしないといつまでも浮気が続き、状況が悪化していくからです。
最悪の状況を避けるためにも浮気に気付いたら早めに手を打つようにしましょう。
旦那の浮気に気付いたら何としても浮気を止めさせたいですよね。
浮気を見破って止めさせるために大切な3つのポイントがあります。
それぞれについて詳しく解説します。
「とにかく問い詰めて浮気を止めさせたい」
という方も多いでしょう。
しかし、浮気を問い詰める前にしなければならないことがあります。
それは裁判でも認められる浮気の証拠を集めることです。
確かな浮気の証拠がなければ、もし問い詰めても浮気を認めずに誤魔化されてしまうからです。
例えば、
それだけでなく浮気を疑われていると気付き
浮気の証拠を消したり慎重に隠れて浮気するようになるので
証拠を集めるのが難しくなります。
そしてその後も浮気が続き状況がより悪化し、
浮気を止めさせることが難しくなるんです。
ですから問い詰める前に裁判でも有効な浮気の証拠を集めることが大切です。
浮気を止めさせるには浮気の証拠を集めることが重要です。
ここで言う浮気の証拠とは、裁判でも有効な浮気の証拠のことです。
では、どのようなものが裁判でも浮気の証拠として認められるかというと
不貞行為を確認または推認できる証拠になります。
(不貞行為というのは配偶者以外の異性と性的な関係がを持つこと。)
不貞行為の証拠があれば、
浮気相手と別れさせて2度と会わないように法的な措置をとれますし、
離婚するなら親権や養育費を取ることができます。
浮気の疑いがあるとすぐに証拠を見つけたいと思う気持ちは分かります。
しかし自分で調べて浮気の証拠を探すのはおすすめできません。
自分で浮気を調査しようとしても気付かれることが多いからです。
そして旦那が浮気を疑われていると気付くと、証拠を消したり、証拠を残さないように浮気するようになります。
それに、自分で調べようとすると違法行為になることもあるので注意が必要です。
例えば、LINEやメールで浮気を調べようとして旦那のアカウントでログインすると「不正アクセス」の違法行為になり、3年以下の懲役または100万円以下の罰金が課されます。
旦那のスマホに勝手にアプリ(浮気調査アプリなど)をインストールすると「不正指令電磁的記録供用罪」になり、3年以下の懲役又は50万円以下の罰金が課せられます。
また、スマホのロックを解除すると違法行為ではなないですが、プライバシーの侵害で訴えられることもあります。
このようなリスクがあるので自分で調査しない方が無難です。
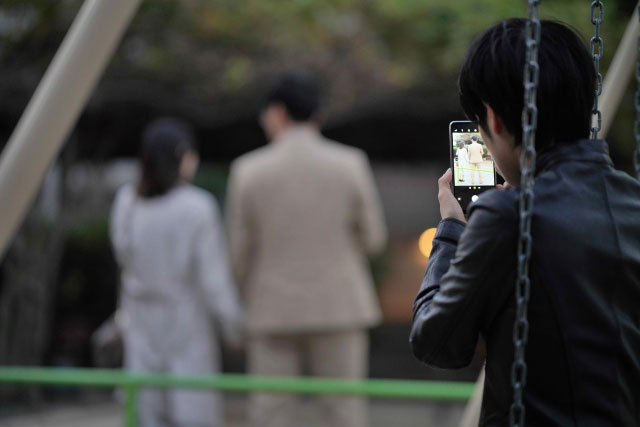
裁判でも有効な浮気の証拠というのは、不貞行為を確認もしくは推認できる証拠です。
具体的には、浮気相手と一緒にホテルや家に出入りする写真や動画になります。
次のようなものは不貞行為の証拠としては認められません。
また、ホテルに出入りする写真もただ写っていれば良いのではなく、
旦那と浮気相手の顔がはっきり写っていて本人と確認できることが必要です。
自分で浮気の証拠写真を
撮るのは難しい
そのような不貞行為の証拠写真を撮るのは、素人にはかなり難しいです。
自分で撮ろうとしても尾行に気付かれることが多く、逆に相手から訴えられることにもなりかねません。
浮気の証拠写真を撮るのは自分には不可能と思われる方も多いのではないでしょうか。
ではどのようにして不貞行為の証拠を撮るかというと、
ほとんどの人は浮気調査で実績のある探偵事務所に依頼しています。
私も
「自分で証拠写真を撮るのは無理」
と思ったので、探偵事務所に依頼しました。
浮気調査においては証拠写真が撮れないことが一番のリスクです。
ですから浮気調査で実績のある探偵事務所に依頼することをおすすめします。
浮気調査に強いと評価されている探偵事務所をランキング形式で紹介します。
原一探偵事務所は、探偵業界で最大手の事務所です。46年の調査実績があり、年間の相談数は5万件にもなります。
浮気調査に強いと定評があり、弁護士から紹介されることも多いです。
また、多くのテレビ番組(「逢いたい」「TVのチカラ」他)へ調査協力もしています。
浮気調査の料金の目安は25万円となっており、一見すると他の探偵事務所より高く感じますが、実は高くありません。
他の安い探偵事務所の場合は1時間あたり7,000円/1人などと表記されていますが、これは1人の調査員が1時間調査すると7,000円という意味です。通常は複数の調査員が関わるので、1時間あたり21,000円ほどになります。
そして数時間の調査で終了することはほぼないので、他の安い探偵事務所と比べても原一探偵事務所の費用は高くありません。それに、総額の目安を提示してくれているので良心的な事務所と言えます。
| 調査費用(料金) | 目安料金 250,000円 トライアルプラン 55,000円 時間制プラン 159,600円~ 定額制プラン 250,000円~ プレミアムプラン 最適なプランを提案 |
|---|---|
| 無料相談の方法 | メール(匿名可能) 電話(非通知可能) |
| アフターフォロー | 専門の資格を持ったカウンセラーがアフターケア |
| 支店 | 全国主要都市に18拠点 北海道(札幌)、宮城(仙台)、茨城(水戸)、群馬(高崎)、埼玉(大宮、川越)、千葉、東京(日本橋、新宿)、神奈川(横浜)、愛知(名古屋)、静岡、大阪、兵庫(神戸)、岡山、広島、愛媛(松山)、福岡 |
HAL探偵社は業界最安クラスの料金体系の探偵事務所です。時間制プランと完全成功報酬プランがあります。
時間制プランは調査員1人あたり1時間7,000円の分かりやすいシステムです。調査員が増えたり、調査時間が長くなるとその分料金が高くなります。また、証拠が撮れなくても料金が発生します。
完全成功報酬プランは不貞の証拠が撮れなければ0円というシステムです。証拠が撮れた場合だけ料金が発生するので、失敗した場合のリスクは低くなります。しかし成功時の料金は時間制プランよりも割高です。
1時間7,000円と聞くと数万円で済むと思われるかもしれませんが、実際のところ浮気調査は複数の調査員が関わる事が多く、総額は高くなります。
公式サイトで公開されている事例では20~60万円ほどです。
| 調査費用(料金) | 時間制プラン 1時間7,000円/1人 完全成功報酬プラン |
|---|---|
| 無料相談の方法 | メール(匿名可能) 電話(非通知可能) |
| アフターフォロー | 無料のアフターカウンセリングあり |
| 支店 | 全国に18拠点 埼玉(大宮、越谷)、千葉、東京(東京本店、有楽町、池袋、恵比寿、八王子)、神奈川(横浜、厚木)、愛知(名古屋)、京都、大阪(梅田、難波)、兵庫(神戸)、岡山、広島、福岡 |
「街角相談所 -探偵-」は、どの探偵社を選ぶべきか迷っている方に対して、ニーズにマッチした探偵事務所の紹介を行うサービスです。
第三者の立場から客観的に最適な探偵社を提案します。 無料ヒアリングを通じて、あなたの状況や要望を把握し、全国100社以上と提携している探偵事務所の中から最適な一社をご紹介。
1社目で希望に合わなかった場合、続けて他社を紹介することも可能です。
また、直接依頼する場合と比べて街角相談所を通すと調査費用が20~40%OFFになります。
オンライン面談もあり、場所や状況に柔軟に対応。相談も面談も無料ですので、気軽にご利用できます。
| 調査費用(料金) | 街角相談所の利用は無料。浮気調査の費用は探偵事務所により異なる。 |
|---|---|
| 無料相談の方法 | 電話 オンライン |
| アフターフォロー | 提携している各探偵事務所が弁護士事務所と連携しているので、必要なときは法的手続きが行える。 |
| 支店 | 全国47都道府県の100社以上と提携 |
浮気調査で実績のある探偵事務所はいくつかありますが、その中でもおすすめは原一探偵です。
原一探偵事務所は業界でも浮気調査に強いことで知られています。テレビ番組の調査にも協力しているほどです。
経験豊富な調査員が自社開発の調査機材で証拠を抑えます。
まず無料相談で状況を確認し、浮気かどうか判断した後で調査するか決めることができます。
浮気の確率は低いと判断され、調査しなければ費用はかかりません。
全国に18拠点あり全国対応での調査が可能。
例えば、尾行していて急に飛行機に乗られると、すぐにチケットが取れないのでそれ以上尾行を続けられません。
そんなときでも別エリアのチームに引き継ぐことができる探偵事務所なら対応可能です。
手遅れになる前に!
無料相談だけでも解決の糸口になる
原一探偵事務所の公式サイトへ
しかし、そう言われても
という方もいると思います。
私が色々調べていたときにこんなものを見つけました。 → 浮気調査完全マニュアル
自分で調査するためのマニュアルです。
何の知識もなく手探りで調べると気付かれて失敗する確率が高いので、このようなマニュアルを参考にすると良いでしょう。
プロの探偵養成にも使われる本格的なマニュアルとなっています。
どうしても予算的に調査依頼するのが難しい場合にはこちらを参考にしてみてください。
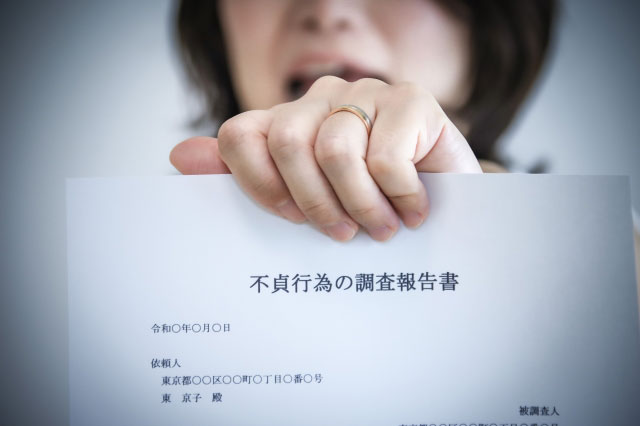
言い逃れさせないために
不貞行為の証拠が重要!
旦那が浮気している確かな証拠があると、夫婦関係を修復するにしても離婚するにしても圧倒的に有利な立場になります。
証拠があれば浮気相手と別れさせて夫婦関係を修復することもできますし、離婚して慰謝料を取ることも可能です。
浮気相手と別れさせるときには浮気相手に法的な措置をとって(接触禁止誓約書など)、旦那に会ったり連絡を取ることを禁じることができます。
もし離婚する場合でも証拠があれば親権や養育費・慰謝料を取ることができます。
そのため話し合いをする前にまずは不貞行為の証拠を用意しておくことが大切なのです。
私も探偵事務所で集めてもらった証拠資料を浮気相手に見せ、
二度と旦那に会わないように誓約書を書かせることができました。
調査費用は多少かかりましたが、家庭が崩壊して全て失うのに比べたら微々たるものです。
探偵事務所に浮気調査を依頼する前にデメリットは無いのか調べたのでまとめておきます。
浮気の証拠や調査報告書を見ると少なからずショックを受けるでしょう。しかし調査しないからといって浮気の事実が無くなることはありません。
たとえショックを受けたとしても、何もせず浮気が続くよりはマシです。早めに手を打つことで家庭崩壊を防ぐことにもつながります。
浮気調査をすると費用がかかります。探偵事務所ごとに費用は違い、20~30万円ほどのところもあれば100万円以上かかるところもあります。
また、浮気しそうな日を絞って調査すれば短期間で証拠が集まり費用も安く済ませることも可能です。
原一探偵事務所は業界最大手ですが、相場よりも安いのでおすすめです。
スキルの低い探偵だと証拠を集められないこともあります。なるべく浮気調査で実績のある事務所に依頼することが大切です。
また、自分で証拠を集めようとして気付かれると、巧妙に隠れながら浮気するようになります。すると探偵に依頼しても難易度が高くなり時間もかかってしまうため、気付かれる前に早めに依頼するのが良いです。
探偵事務所によっては匿名のメールや非通知の電話で無料相談することができます。そのような事務所なら相談したからといって情報が漏れることはありません。
そしてプライバシーに配慮した大手の事務所なら、浮気調査を開始したとしても情報が漏れて周りに知られる心配は少ないでしょう。
浮気調査を依頼するメリットは以下のようなものがあります。
自分で浮気の証拠集めをしても失敗することが多く状況が悪化してしまいます。
実績のある探偵事務所なら証拠写真を撮れる可能性が高く、問題解決への近道となるでしょう。
浮気調査で実績のある探偵事務所はいくつかありますが、その中でもおすすめは原一探偵です。
原一探偵事務所は業界でも浮気調査を得意としていることで知られています。
テレビ番組の調査にも協力しているほどで、経験豊富な調査員が自社開発の調査機材で証拠を抑えます。
まず無料相談で状況を確認し、浮気かどうか判断した後で調査することになります。
浮気の確率は低いと判断され、調査しなければ費用はかかりません。
無料相談は匿名メールや非通知の電話で良いので、こちらの個人情報が漏れる心配はありません。
原一探偵事務所は全国に18拠点あり、全国対応での調査が可能です。
調査対象が長距離を移動したときは、別エリアのチームに引き継いで調査を継続します。
例えば、尾行していて急に飛行機に乗られると、すぐにチケットが取れないのでそれ以上尾行を続けられません。
そんなときは、別エリアのチームに引き継ぐことができる探偵事務所でないと対応できません。
手遅れになる前に!
無料相談だけでも解決の糸口になる
原一探偵事務所の公式サイトへ

旦那が浮気していた場合、時間が経つほど浮気から本気になったり、不倫相手に貢いでしまったりと状況が悪化していきます。
浮気しているかもしれないと気付いたときは、早めに対策をすることが重要です。
早ければ早いほど良い結果につながる可能性が高いです。
私もそうでしたが、一人で悩んでいるだけでは何も解決しません。
悩みを聞いてもらうだけでも解決への糸口になることもあるので、無料相談することをおすすめします。
今は辛くて悩んでいてもきっと明るい未来がやってきます。
\電話・メールで無料相談できる/ 原一探偵事務所の無料相談はこちら